Notes
Notes give you a place to write your own thoughts beside Scripture. Each note is connected to a verse, so you can return to the passage while studying or browse your notes later by Bible book and chapter.
What notes do
Section titled “What notes do”A note saves what you write together with its Bible verse. You can format the text, add tags for organization, edit it later, or open the verse again in the Reader.
Notes are different from highlights. A highlight marks Scripture with a color. A note records your own words about the passage. You can use either feature on its own or use both on the same verse.
When you might use them
Section titled “When you might use them”- Record a question you want to study later.
- Write a prayer, observation, or personal application.
- Summarize what you learned about a verse.
- Add tags such as
prayer,promise, orsermonto organize related notes. - Keep study notes available beside the Scripture that prompted them.
Where to find notes
Section titled “Where to find notes”You create a note in the Reader. After you have saved at least one, you can find it in these places:
- In the Reader, a note icon appears in the gutter—the narrow margin beside the Scripture text—next to every verse that has a saved note. Tap the icon to open and read that note, then tap Edit if you want to change it.
- Open the main menu and tap Notes.
- Open Home and tap the Notes total.
- Open a Bible book’s detail card on Home and tap Notes to see notes from that book.
The Notes total on Home or a book detail card opens only when at least one matching note has been saved.
See it in GospelGrasp
Section titled “See it in GospelGrasp”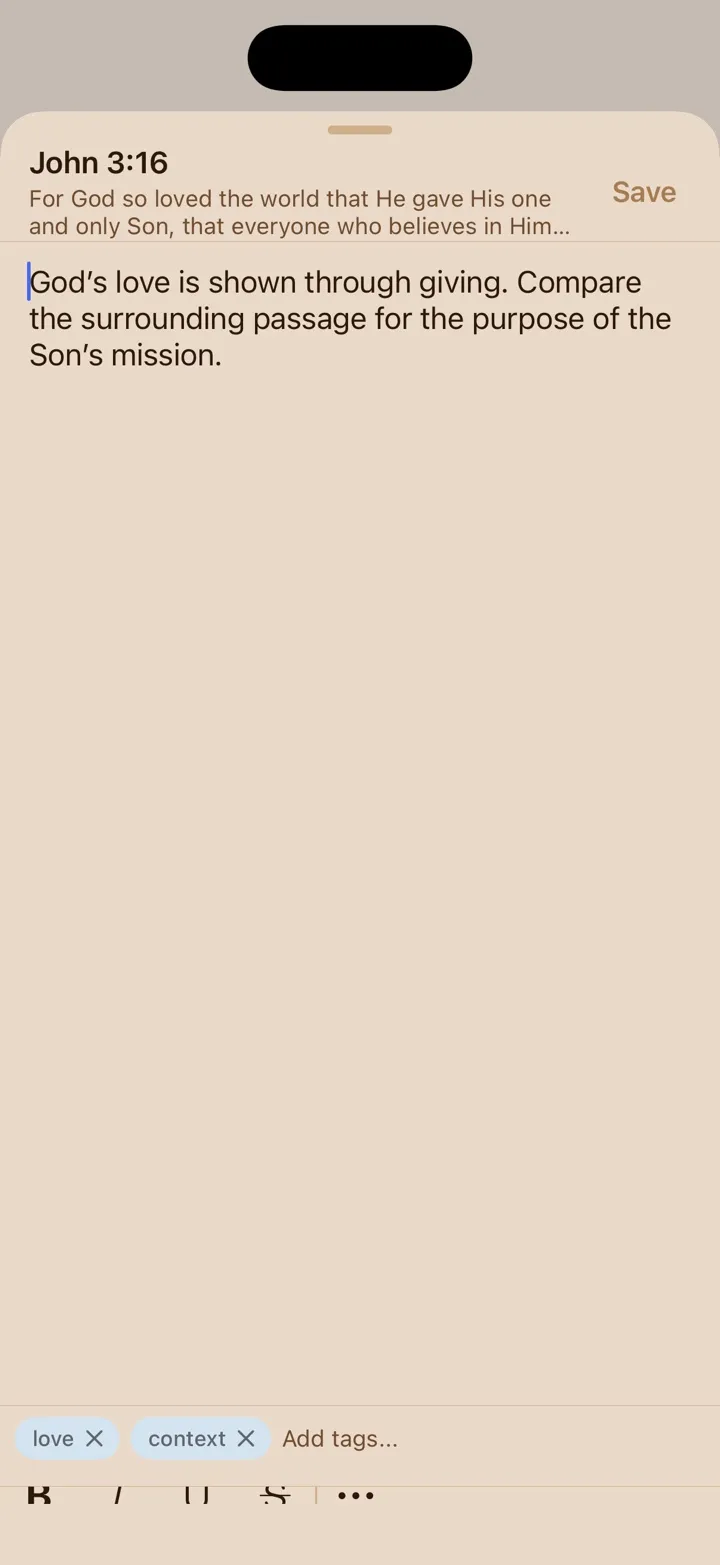
The note editor keeps formatting and tags within reach while you write.
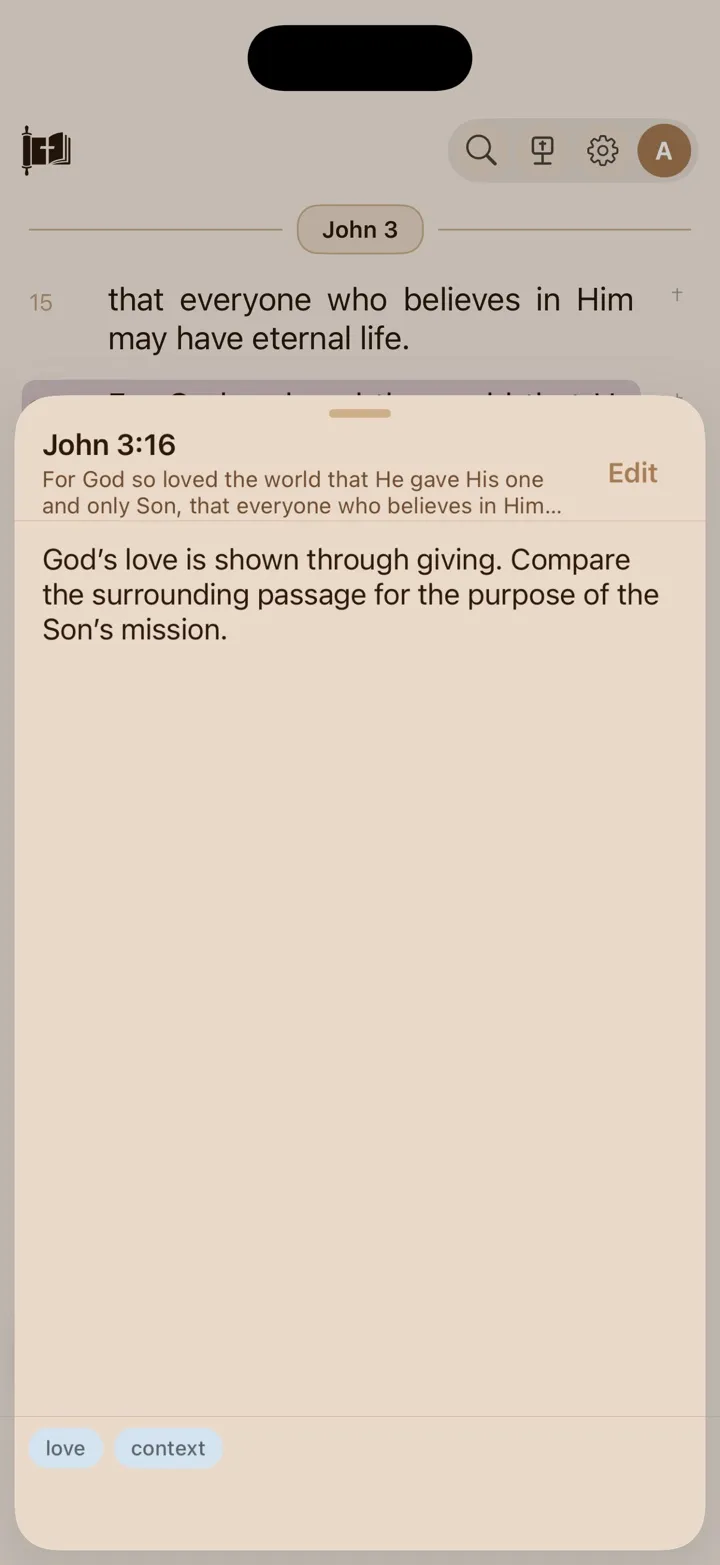
A gutter marker lets you open, read, and edit a note without leaving the Reader.
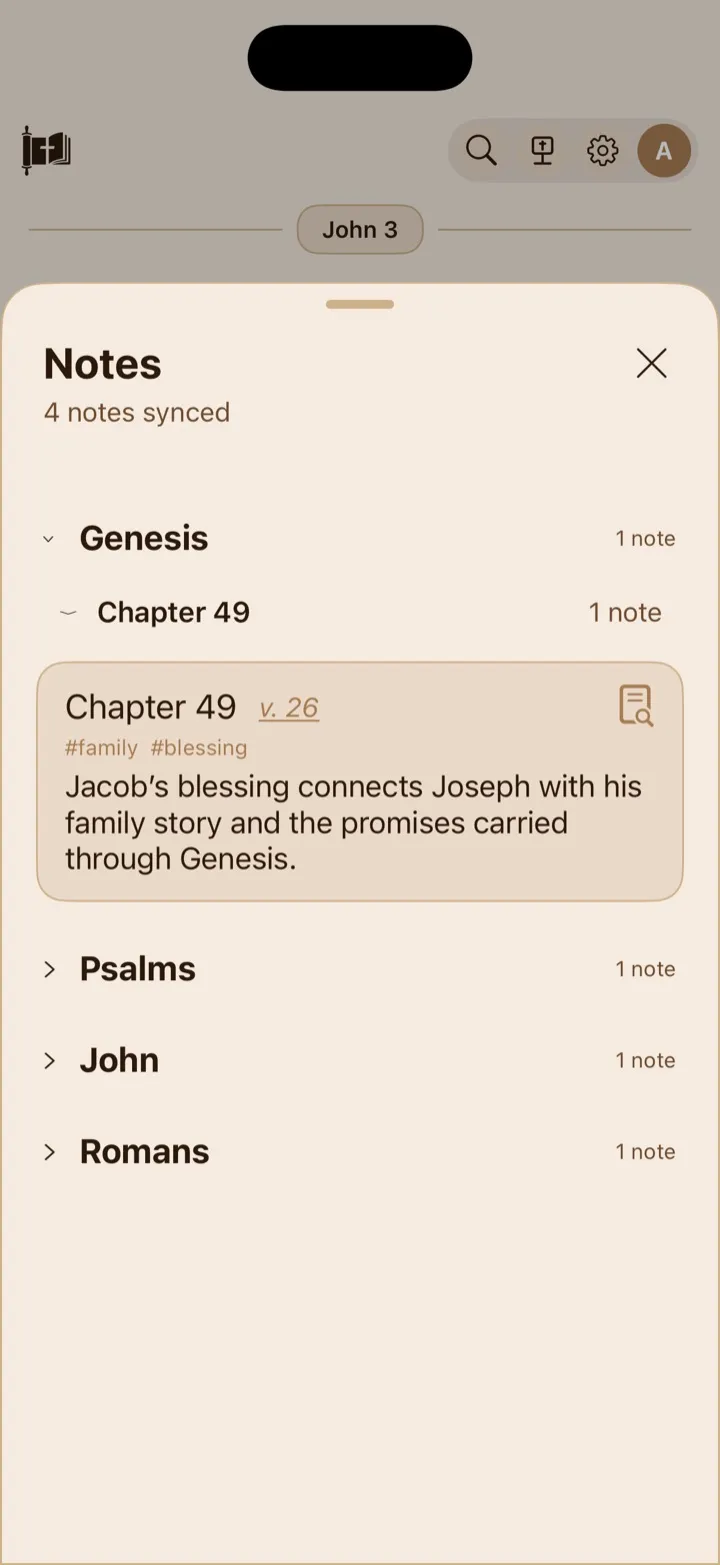
Notes are grouped by book and chapter; expand a note to read its contents and tags.
Create a note
Section titled “Create a note”- In the Reader, select a verse or place the selection within the verse you want the note connected to.
- Tap Note on the bottom toolbar.
- Write your note.
- Add formatting or tags if you want them.
- Tap Done.
GospelGrasp saves the note to that verse and shows the formatted result. If the verse already has a note, tapping Note opens the existing note for editing instead of creating a second note.
If you selected words from more than one verse, the current iOS app connects the note to the first verse in the selection. It does not save the selected words or the full verse range as part of the note.
An empty note is not saved. If you close the editor without tapping Done or Save, your unsaved changes are discarded.
Format a note
Section titled “Format a note”The formatting controls appear above the keyboard. GospelGrasp shows the formatting as you write, so you do not need to work with Markdown symbols or other special codes.
Format text
Section titled “Format text”Select the text you want to change, then use:
- Bold for stronger emphasis.
- Italic for lighter emphasis.
- Underline to draw attention to text.
- Strikethrough to show text as crossed out.
These choices also appear near selected text for quicker access.
Insert headings, lists, and other blocks
Section titled “Insert headings, lists, and other blocks”Tap More options, shown as an ellipsis, to open Insert. The current iOS editor offers:
- Callout — places text in a colored block so it stands out.
- Chip — adds a small colored label within a line.
- Heading — adds a large section title.
- Subheading — adds a smaller section title.
- Bullet list — starts a list with bullet points.
- Numbered list — starts a numbered list.
- Code block — places text in a fixed-width style. This can also be useful when spacing or exact characters matter.
Choose an item, then continue writing in the note.
Add tags
Section titled “Add tags”Tags are short labels that help describe or group your notes.
- Tap Add tags… at the bottom of the editor.
- Type a tag.
- Press Space or Return to turn it into a tag.
- Tap Done or Save with the note.
As you type, GospelGrasp can suggest tags you have used before. Tap a suggestion to reuse it. Exact duplicate tags are not added.
To remove a tag while editing, tap the x on its tag. In the current iOS build, removing the final tag from an existing note may restore that tag when the note is saved. This is a known issue; removing one tag while leaving another works normally.
View and edit a note in the Reader
Section titled “View and edit a note in the Reader”A note marker appears beside a verse that has a saved note.
- Tap the note marker to open the saved note.
- Read the note in its formatted view.
- Tap Edit when you want to make changes.
- Tap Save when you are finished.
If GospelGrasp cannot save the note, it shows Save Failed. Keep the editor open and try again so your changes are not lost.
Browse all notes
Section titled “Browse all notes”- Open the main menu and tap Notes.
- Tap a Bible book to expand or collapse it.
- Tap a chapter to show or hide its notes.
- Use the expand control on a note to show or hide its formatted contents.
Books follow Bible order, from Genesis through Revelation. Chapters and verses appear in number order. GospelGrasp opens the first available book automatically when you enter the list.
If you have no saved notes, the card shows No notes yet.
View notes from one Bible book
Section titled “View notes from one Bible book”- Open Home.
- Tap a Bible book to open its detail card.
- Tap that book’s Notes total.
The card opens with a title such as John Notes and shows only that book. Tap Show all books to remove the filter and return to your complete Notes list.
Open a note’s verse in the Reader
Section titled “Open a note’s verse in the Reader”Open the note in your Notes list, then tap its Scripture reference. GospelGrasp closes the Notes card and opens that verse in the Reader.
Edit or delete a note from the Notes list
Section titled “Edit or delete a note from the Notes list”Swipe left on a note to reveal its actions.
- Tap Edit to change the note, its formatting, or its tags.
- Tap Delete to remove the note.
Before deleting, GospelGrasp asks Delete note? Tap Delete again to confirm or Cancel to keep it. On a plan that includes Cloud Sync, the deletion reaches your other supported devices and the PWA after syncing.
What GospelGrasp saves or syncs
Section titled “What GospelGrasp saves or syncs”Notes are saved on your device first. You can create, read, edit, and delete them without an internet connection.
On a plan that includes Cloud Sync, such as 4F or Pro, GospelGrasp syncs your notes when you are online. 4F means Free for Faithful Followers. Synced notes can appear on your other supported devices and in the GospelGrasp PWA. Changes made elsewhere can also return to this device.
The Free plan keeps notes on the device where you created them. They do not sync across devices unless your account moves to a plan that includes Cloud Sync.
Notes written in the PWA may arrive as rich text. GospelGrasp converts the supported headings, bold and italic text, lists, paragraphs, and links so the note displays as formatted text instead of showing HTML code. Formatting the iOS app does not recognize may appear as plain text.
Opening the Notes card asks GospelGrasp to check for synced changes, then shows the notes currently available on this device. New notes, edits, and deletions wait safely on the device when you are offline and sync later when your plan and connection allow it.
Requirements and limits
Section titled “Requirements and limits”- Notes can be created and used without an internet connection.
- Cross-device and PWA syncing requires an internet connection and a plan that includes Cloud Sync.
- Each note created in the current iOS app is connected to one verse.
- The current iOS Insert menu does not include a Scripture-reference block.
- Closing the editor without saving discards unsaved changes.
- The main Notes card groups saved items by book and chapter. To begin with one book already filtered, open Notes from that book’s detail card on Home.
If something does not work
Section titled “If something does not work”The Note button is unavailable
Section titled “The Note button is unavailable”Select a verse or text within a verse first. Tap a verse number when you want to connect the note to the whole verse.
A note does not appear on another device or in the PWA
Section titled “A note does not appear on another device or in the PWA”- Confirm that your account plan includes Cloud Sync.
- Connect both devices to the internet.
- Open Notes to check for synced changes.
- Make sure both devices are signed in to the same GospelGrasp account.
The Free plan keeps notes on the device where they were created.
I cannot find a note
Section titled “I cannot find a note”Open Notes, expand the Bible book, and then expand its chapter. If you opened Notes from a book detail card, tap Show all books to check the rest of your notes.
A note could not be deleted
Section titled “A note could not be deleted”If GospelGrasp shows Could not delete note, close the message and try again. The note remains saved unless the deletion succeeds.
Common questions
Section titled “Common questions”Does a note include the Scripture text?
Section titled “Does a note include the Scripture text?”The note stays connected to its verse, and the editor shows the verse for context. Your note contains the words you write; it does not make a second copy of the Bible text inside the note.
Can I have more than one note on the same verse?
Section titled “Can I have more than one note on the same verse?”The current iOS Reader opens and updates the existing note for that verse instead of creating another one.
Can I use notes while offline?
Section titled “Can I use notes while offline?”Yes. GospelGrasp saves them on your device first. Cloud Sync waits until your plan and connection allow it.
Do notes from the PWA keep their formatting?
Section titled “Do notes from the PWA keep their formatting?”Supported rich-text formatting is converted for iOS display. Unrecognized formatting may be shown as plain text.